Get your first workspace and RAG server running.
1

Create a Workspace

Launch the Web UI and create a workspace to encapsulate your configuration, data, and server.
2

Configure

Navigate to the Configuration tab. Select a Vector Store (e.g., LanceDB) and an Embedding Model (e.g., OpenAI).
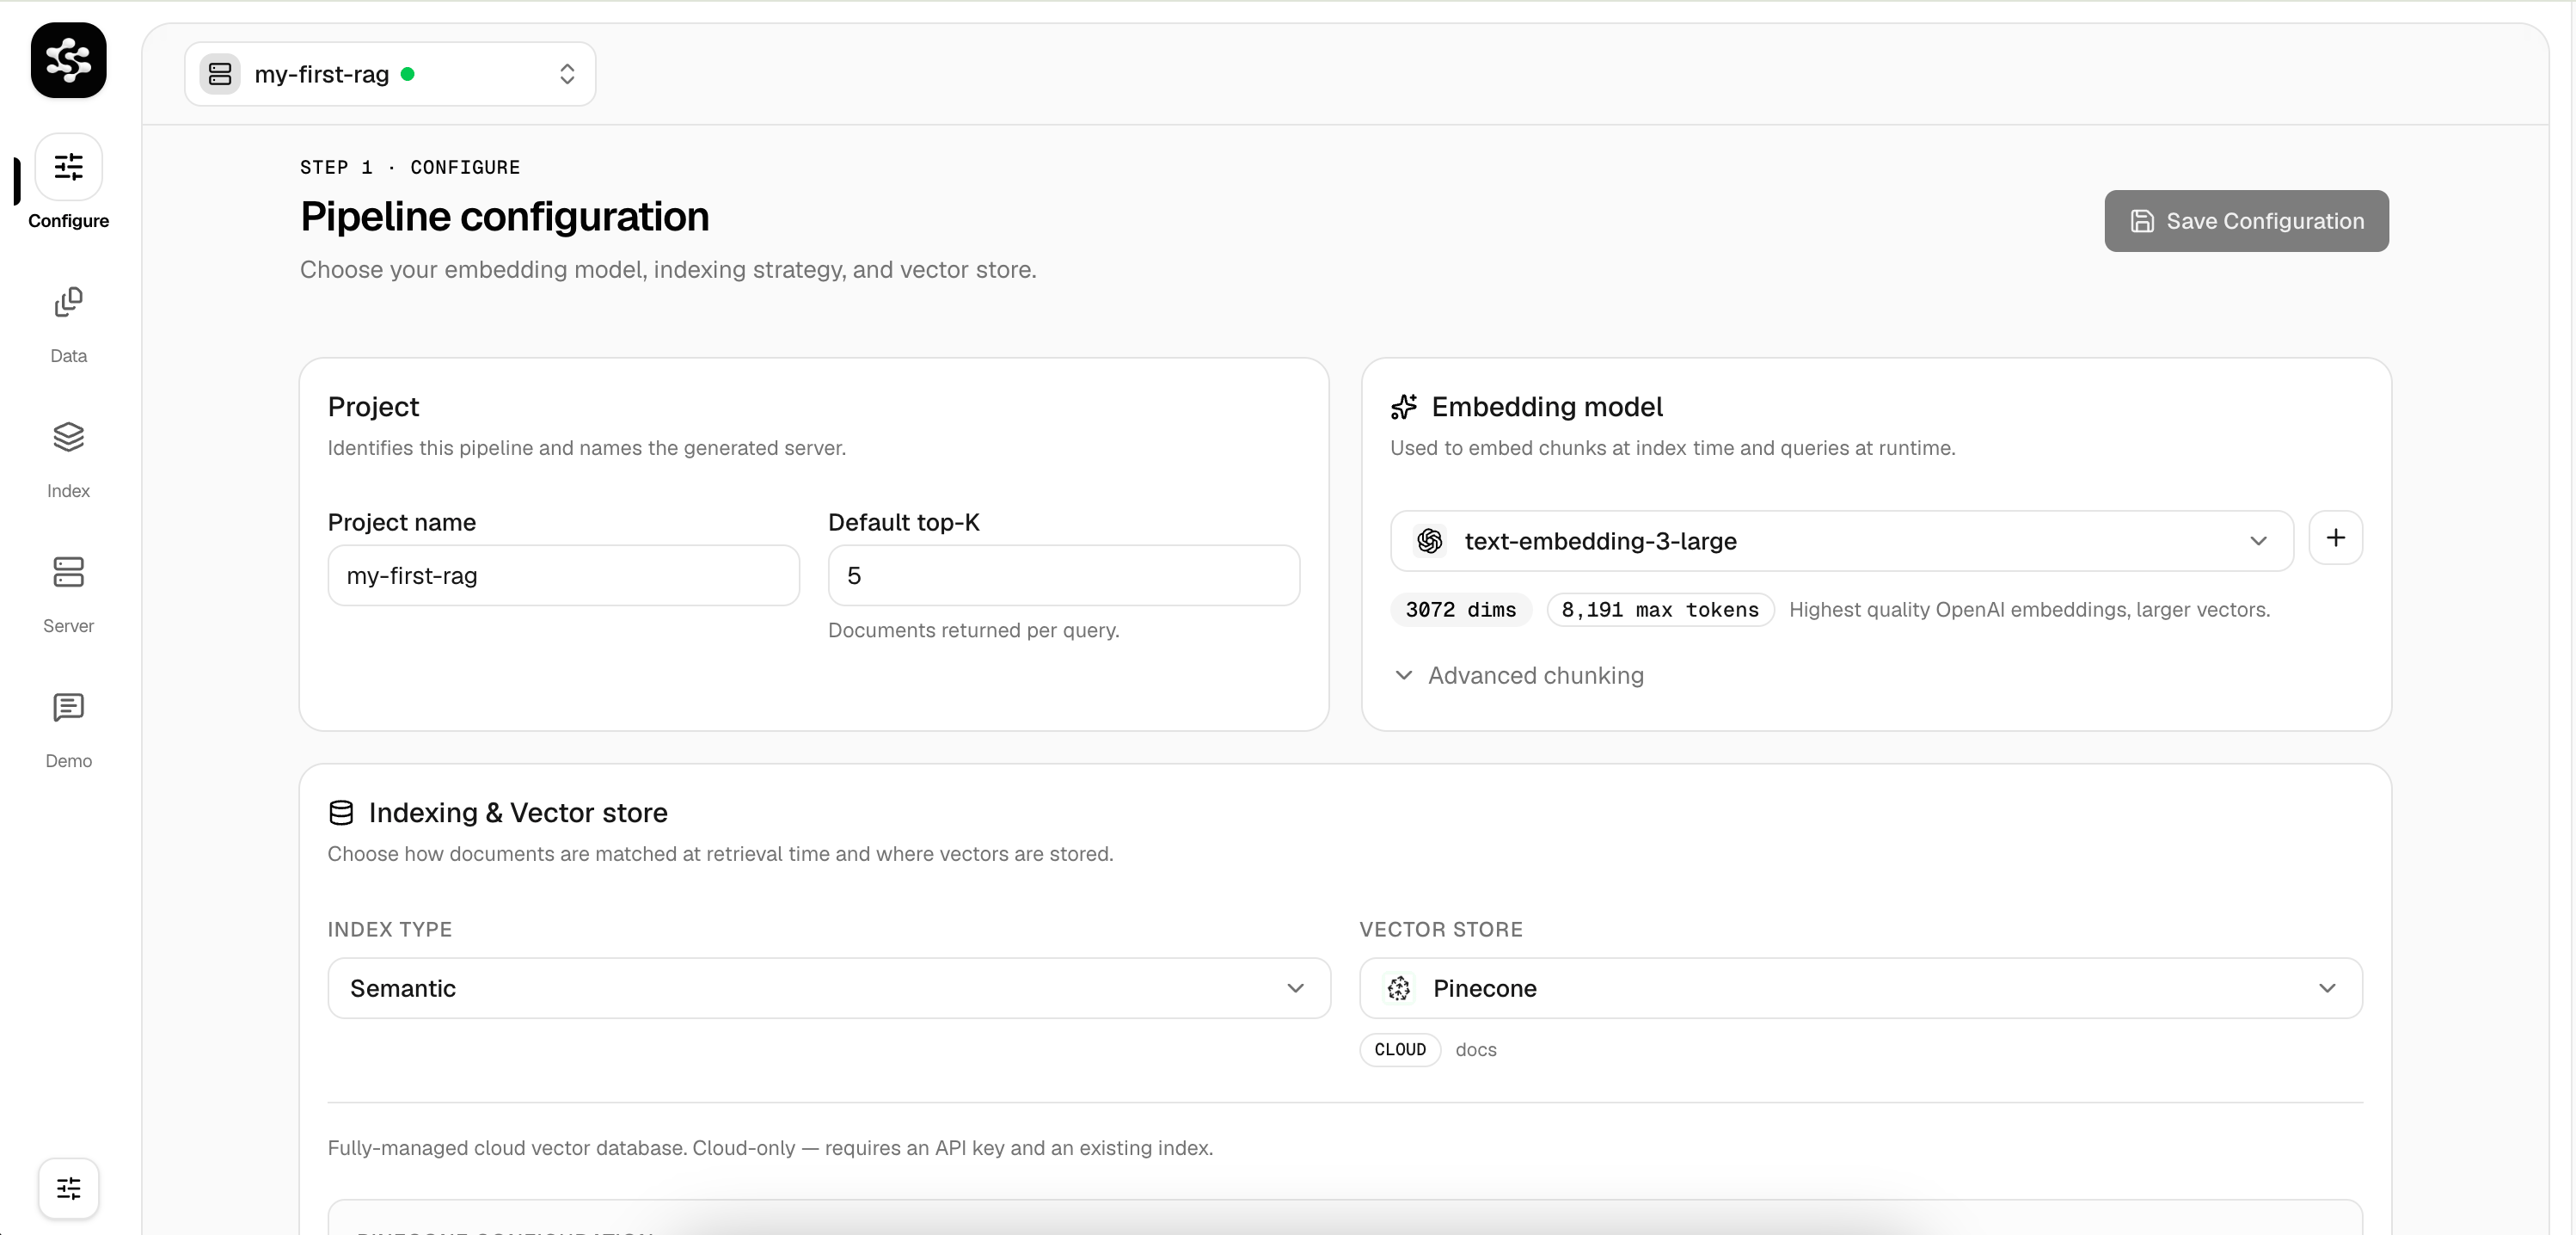
Configuration Page
3

Ingest Data

In the Data tab, add documents via file upload, direct text input, or web scraping. These queue up for the ETL process.
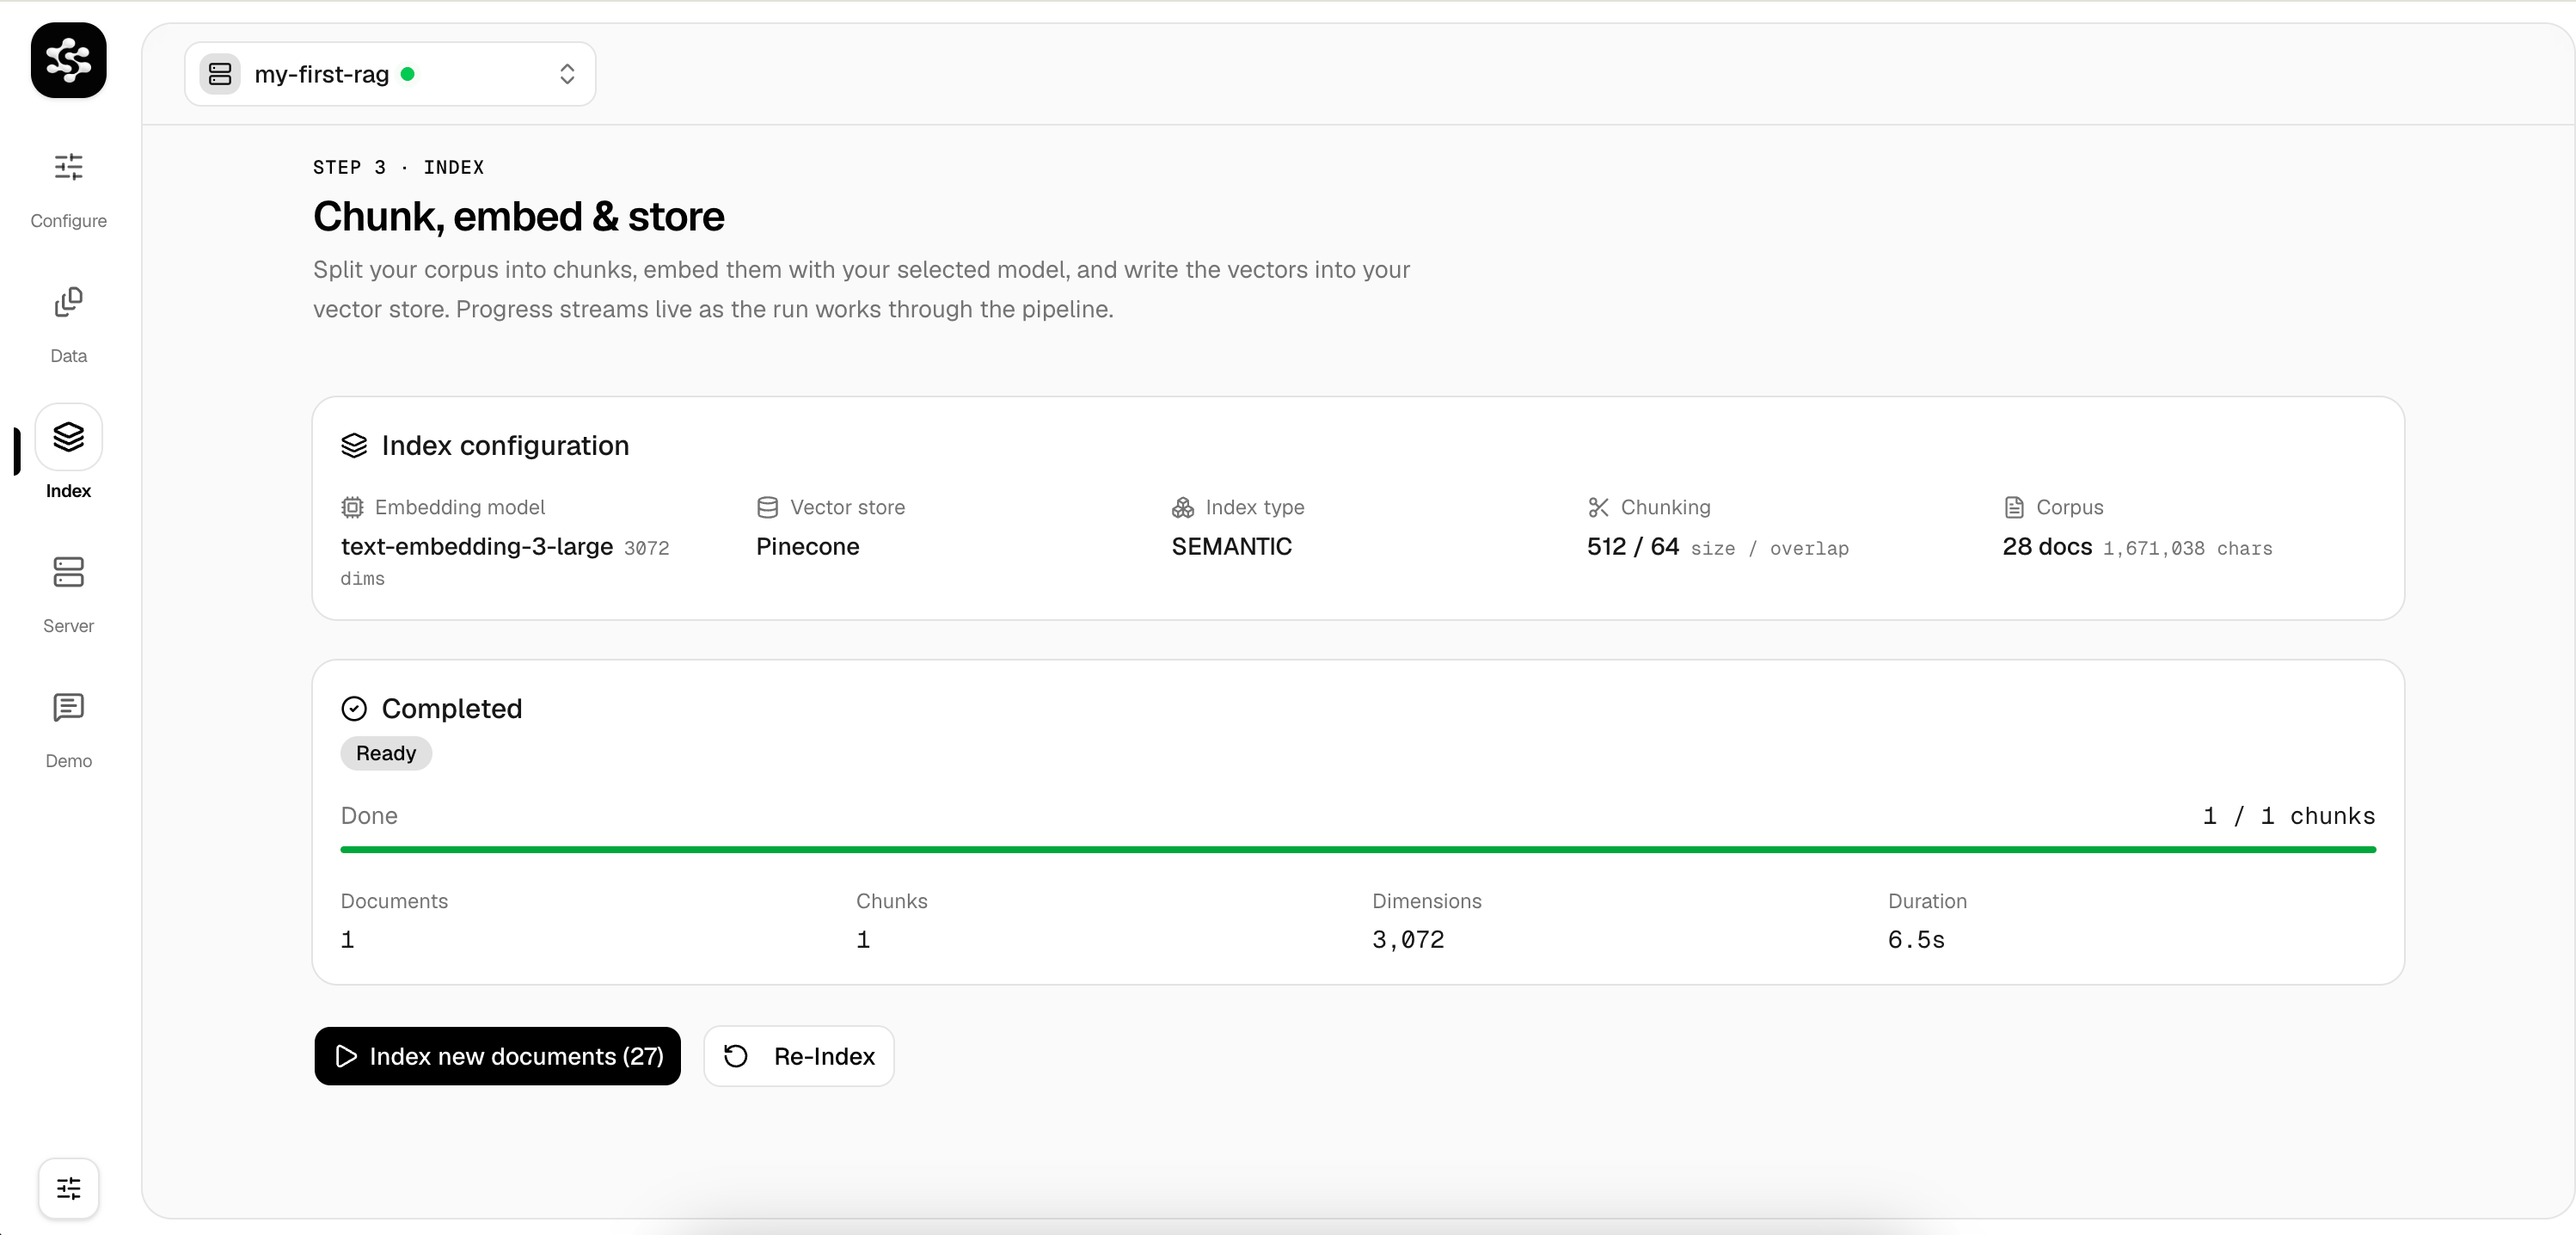
Data Ingestion
4

Index

Head to the Index tab and click Run Indexing Job to chunk your documents and store the vectors.
Indexing Data
5

Launch the Server

Go to the Server tab and click Launch Server to generate an optimized Node.js backend. Test queries instantly in the Demo tab!
Launch Server
View the API schema using the integrated Scalar UI:
Server API Reference

Connect to the Server

Connect your AI agents to the running server using the TS or Python SDKs:
import { tool } from "ai";
import { z } from "zod";
import { LarkupRAGClient } from "@larkup/rag-sdk";

const ragClient = new LarkupRAGClient({
  baseUrl: "http://localhost:3000",
  apiKey: "your-api-key",
});

export const ragTool = tool({
  description: "Search the knowledge base.",
  parameters: z.object({ query: z.string() }),
  execute: async ({ query }) => {
    const results = await ragClient.query(query, 5);
    return results.hits.map((hit) => hit.text).join("\n\n");
  },
});
Dive deeper into each stage in the Application Guide.